Free Shipping
On orders $99+
On orders $99+


If you’re looking for a lighting fixture that can do it all, then look no further! Also known as can lights, pot lights, and high hats, recessed lighting is incredibly versatile. You have the ability to provide lighting for different purposes. These fixtures are the perfect way to add functionality and visual appeal to a home while providing adequate illumination to a space. Commonly used on the ceiling. Recessed lighting provides overall lighting, creates a certain desired look or mood, or can provide light for reading or doing personal tasks.
Downlighting, wall lighting, or uplighting are creative choices that you can incorporate into your lighting design. Recessed lights have diameters ranging from 3 to 6 inches. The size you choose will depend on your intended use for the lights and its location. But before you even install recessed lighting, it’s best to learn about the fixtures, and the terms associated with them. Look into the basic components of these fixtures, the housing and trim. They are necessary for the lights to work as intended. Recessed lighting is practical, elegant, and will add character to your space.

Anatomy
The process of choosing recessed lighting fixtures can be overwhelming and confusing. Let’s start with the housing, or the “rough-in”. It is the protective shield around the downlight fixture that is hidden above the ceiling line and held into place with a mounting frame.
Determining size
Consider the space between the ceiling and the roof interior or upper floor when determining the housing size. That space is known as the plenum. Keep in mind, if the plenum isn’t deep enough, you may need to install flushmount lights instead. However, shallow recessed lighting may be an option if you find you have limited space. These fixtures are no more than 5 inches deep, with smaller sizes available. Use them for ceilings with 2 by 6-inch or 2 by 12-inch joists. Because residential downlights are no larger than 7 ½ inches deep, they will likely fit into the hole. Deep housings are also available if you need it. While they do produce less glare, they don’t fit in a 2 x 8 construction. Recessed lighting is placed between the joists, which work like horizontal studs, and are spaced 16-24 inches apart. Once you find the first joist, you should find the rest with no problem using a stud finder.
IC versus non-IC ratings
There are many different types of housing available so it’s important to choose the correct one. You must consider how heat will affect the fixture and the type of ceiling you have. Dangerous overheating may occur if the fixture and insulation material touch. As a solution to this problem, the National Electric Code (NEC) created IC (insulated contact) ratings. If housing is less than 3 inches from the insulation the fixture must have an IC rating. These housings have shields to protect against heat. But because these fixtures have the light source near the trim, they emit more glare. Manufacturers limit wattage for this reason. Fixtures with a non-IC rating need at least a 3-inch buffer between the housing and the insulation material since the housing lacks the heat protection of an IC rated housing.
IC rated remodel housings are required if your home has existing walls. If you have a brand-new space or no drywall yet, then use non-IC rated housings. These are also best for ceilings that aren’t insulated. Some recessed lights are both IC and non-IC rated but have different wattages or bulbs. Manufacturers may offer a premium housing line, though it requires more plenum room. Pay attention to the IC rating when buying your lighting fixtures so that they can operate safely in your home.
New Construction versus Remodel Housing
Whether you use remodel housings or new construction housing depends on how your house was built. The installation process between the two housings is different. New construction housings are for homes without drywall or sheetrock. You just need access to the space above the ceiling for installing the recessed lighting fixtures.
When you have existing ceilings or limited access to the ceiling, use remodel housings. Keep in mind, these fixtures are more expensive and have fewer trim options available. Install these fixtures by cutting a hole in the drywall. Place the housing inside of it. Then push a metal clip into it to hold the housing in place. When upgrading your lighting fixtures to a LED system, it’s best to use remodel housing.
Airtight Housing
Sometimes fixtures release heat that rises into the attic or top floor. This increases the costs of heating and cooling. The solution is airtight housing, a downlight that is installed on the bottom floor. These lights go through laboratory testing to ensure it’s properly sealed so air flow doesn’t exit the recessed light. States are beginning to require airtight housing in a new home construction with a bottom floor.
Shallow Ceiling versus Sloped Ceiling Housing
If your ceiling uses 2-inch by 6-inch joists or you have a floor above you, then you need shallow ceiling housing. The downside is you may have to fish the wire through the ceiling frame, which can be quite difficult. Sloped ceilings have special housing and trims that you install, where one side of the fixture is longer than the other. That way, it can fit into the hole and cast a beam of light straight down. You will need to calculate the slope, or pitch, of the ceiling before installing sloped ceiling fixtures.

Anatomy
The decorative molding around the opening of the light is the trim. The trim includes the trim ring, optics, and the light bulb or “lamp”. There is a broad range of trims available in many shapes and sizes and serve different purposes. Go with classic round trims or trendy square trims. Select from various materials, like decorative flange, glass, metal, or crystal. Note that your trim style should match the theme or decor of the space.
There are different types of optics, each having a specific function. Your optics selection depends on your desired style and the effect you want to create. Blend your fixture onto the ceiling with high-end looking flangeless trims. Or try a flanged trim, which resembles a flangeless trim but has a thin trim that isn’t flushed with the ceiling. Use a bevel trim for depth, or a flat trim for a minimalist finish.
Determining size
The size of your trim will depend on how you use the fixture, so measure the aperture. A 6-inch aperture is standard for homes, but 3-4 inches are becoming increasingly popular. The aperture is continuing to shrink in size. Note that a 6-inch trim has more finishes to choose from than a 3- or 4-inch trim. Smaller size trims, such as 1-2-inch trims, are perfect for spotlighting. The location of your recessed lighting will affect how the space is illuminated. Installing recessed lighting on a low ceiling will brightly illuminate a room but look dim on a taller ceiling. So, think about the size to function ratio when picking your trims.
Types and uses
There are numerous other trims to choose from. Let’s start with the open trim. It is ideal for unrestricted illumination. This fixture is flushed against the ceiling. Baffle trims, the most common, are useful for general lighting. Consider its color and shape because they impact the effectiveness of the fixture. These trims diffuse light better than an open trim, which is flush or almost flush with the ceiling and will cast unrestricted illumination. A baffle trim has large grooves that absorb excess light, reducing glare. Black baffle trims reduce the most glare. If you’re looking to blend the fixtures on the ceiling, then white baffle trims will do the trick. These fixtures have bulbs that aren’t flush with the ceiling. A reflector trim, which also has a bulb that extends from the ceiling, produces uncontrolled light amplified by the trim’s mirrored surface. However, you may be able to tint the fixture.
Confine light to a specific area on the wall with a wall wash and draw attention to vertical surfaces, such as a fireplace or artwork, to make the room look bigger. Spread the light evenly throughout the space with a special wash trim. An eyeball trim allows you to pivot the light and focus it on a specific area to accent or wall wash. You can choose to fully pivot the housing to block some light. A gimbal trim, or adjustable trim, is like an eyeball trim, except the gimbal trim isn’t flush with the ceiling. Although it’s less flexible than an adjustable trim, the gimbal trim redirects light really well. This gives you the freedom to change furnishings and move the light to accent any object you want. Or you can cast a narrow beam of light using a pinhole trim, perfect for accent lighting as well.
A shower or outdoor area requires a wet-rated fixture or shower trim to protect against the hazards of mixing water with electricity. The trim has a tempered glass lens to protect the electronic components.
Your trim finishes should match the finishes of your home. Be sure that they are the same size, brand, and product family as the housing. Nickel, chrome, bronze, and silver are all popular finishes. If you’d like to keep your housing but change your trim, there may be options available for you to buy.
Voltage
First, find out the correct voltage of your housing. Then decide on either line voltage, low voltage, or integrated LED housing. Like regular ceiling lights, line voltage housing is 120V and connects to a standard 110-120 volt feed. They are less expensive to buy and easier to maintain than low voltage or integrated LED housing. However, the money you save initially will go towards replacing lamps and parts in the future. Low voltage housings use a transformer to convert 120V to 12V or 24V. While it is a lower voltage, you have a more focused beam of light that gives you control over light color, quality, and dimming. Then there are LED housings which have low maintenance costs and are energy efficient. However, once the bulb needs to be replaced, the entire unit needs to be replaced as well. Of the three, LED housings provide the most control over light and dimming capabilities.
Bulbs: What to look for
When choosing your bulbs, or lamps, you will need to look at several factors. Lumens and watts are two measurements that affect light quality. Lumens measure the level of brightness while watts measure the amount of electricity required for the bulb to work. It makes sense to choose Energy Star certified bulbs because it provides the same level of brightness using less watts. Check the inside of the housing for the wattage and bulb type. Remember to not exceed the maximum wattage of the light fixture.
There are four different types of lamps to choose from. The most common is the “A” lamp because it can be applied as task or accent lighting. If you’re looking for beam control ideal for spotlighting, floodlighting, or accent lighting, “R” lamps are your go-to. Its reflector also increases the amount of light the fixture emits. PAR lamps have long beams and a wide spread perfect for task lighting and general lighting. Use MR16 if you want beam control for accent lighting. Halogens and LEDs are the most common bulbs for recessed lighting. Halogen bulbs are great for narrowing the focus of the light. Or you can go wide with a flood-style halogen. If you have LED retrofit trims, bulbs aren’t necessary because the light source is already integrated into the fixture. They are also energy efficient, resulting in a lower utility bill.
Note the type and size of the bulb that the fixture uses. You may need a screw-in bulb or a pin-base bulb, unless it is a LED light. Keep in mind, color temperature, lumens, and wattage have an impact on light quality. The living room and bedrooms should each have a warm white color temperature. Bright a white color temperature should be used in kitchens and workspaces. If you’re looking to provide adequate light for your reading nook, a daylight color temperature that looks similar to overcast, will work perfectly.
Considering LEDs
Choosing LEDs has its advantages. They are energy efficient, have low maintenance costs, are environmentally friendly, and produces light that looks similar to incandescent bulbs. The estimated lifespans for traditional light sources don’t compare to LEDs. An incandescent lasts 750 to 2,000 hours, a compact fluorescent (CFL) has about 7500-20,000 hours of life, while LED lights last 35,000-50,000 hours! According to the Department of Energy, you may see a 33% decrease in lighting electricity demand over the next 20 years with LED use on the rise.
Most LED recessed lights are integrated LED, so you don’t need a bulb. But there are some integrated bulbs that actually have replaceable light engines. That way you can still keep the fixture. If you are looking for replacement LEDs, 17W and 9W are available options. Integrated LEDs spread heat out evenly, lasting longer and maintaining their brightness. Another upside to LED lights is that they lack UV radiation. This means these lights don’t attract bugs, so you won’t spend your summer nights swatting at them.
Since LED recessed retrofits are adaptable to most residential recessed housings you can update older recessed fixtures by replacing the trims. Just screw in the LED light into the bulb socket and hold it in place with clips. LED retrofit kits also allow you to convert incandescent recessed lights to LED while keeping existing housings. The fixture itself, not the LED light, determines the wet rating so it’s important to make sure it is labeled properly and can withstand places where it’s likely to come into contact with water. While you can convert from incandescent to LED, be aware keep that not all LED lights are dimmable. There are states and municipalities that are starting to require LEDs due to their high efficiency. It’s best to check rules and guidelines to see if it applies to you.
Note: Avoid having to purchase the housing and trim separately and buy a recessed lighting kit which contains both parts. Line-voltage kits use household current. Low voltage kits convert 120V to 12V using a transformer, lowering energy costs. Some kits have built-in transformers. However, the kit is pricier than buying the housing and trim separately.
Now that you know about recessed lighting components and how to choose them, let’s review some common recessed lighting questions.
Figure out your lighting purpose and determine which fixtures are appropriate for serving that purpose. Small recessed lights go well with modern decor. Larger lights complement traditional styles and produce good ambient lighting. Recessed lighting is also ideal for highlighting areas or providing lighting for completing tasks. Remember, the ceiling height impacts the lighting effects of the fixtures. The lighting effect you want to create is determined by the layout of your room.
Ambient lighting
Illuminate an entire room with ambient lighting fit for working or socializing. This layer is also ideal for areas that have heavy foot traffic, such as the living room. Install recessed lights on a low ceiling for a wide beam of light to deliver an adequate amount of ambience. If you want a narrow beam of light, then place the lights on a high ceiling. Try standard open trims, premium baffles, premium deep baffles, standard baffles, and WETlites. Space the recessed lighting 4ft to 6ft apart to produce the ambient lighting layer.
For general downlighting it’s best to use the rule of thumb for 6-inch housing. Space the fixture 4ft to 5ft apart in an 8ft to 10ft high ceiling. This will produce uniform lighting. Open and baffle trims are appropriate downlight fixtures for overall illumination.
Kitchen
Properly light your kitchen with high ambient light. You’ll need a 3 inch to 4 inch aperture and a light source that emits 700-1200 lumens per light. The color temperature should be between 2700-3000K. Leave 2ft to 3ft of space between each light, regardless of whether you choose a flood or narrow beam spread. Baffle, adjustable, or open reflector trims are appropriate. Measure the space to determine how many fixtures you will need for overall lighting. Illuminate works areas by placing the lights around the perimeter of the room and positioning them towards countertop edges. This will eliminate shadows caused by standing under the fixture while in your workspace, blocking light.
Living room
Here, you’ll need low ambient light. Make sure your fixture has a 2 inch to 3.5-inch aperture. There should be 400-800 lumens per light with a color temperature between 2700-3000K. The temperature of existing task lighting should be the same. Leave 3ft to 4ft of space between each light. Proper trims for this layer include open, reflector, baffle, or adjustable trims. Place the fixtures in each room corner with 50W halogen flood bulbs for the best results.
Entryway or hallway
Use ambient lighting to open up your stairway landing and hallway. This area requires low ambient light. Place lights on the ceiling over the walkway and aim it at artwork on the wall to create a focal point for the space using low voltage fixtures with 50W MR-16 bulbs. The fixture should have a 2.3 inch to 5-inch aperture, emit 400-800 lumens per light, and have a 2700-3000K color temperature. You’ll need narrow or spot beam spread and to maintain 3-4ft of space between each light. Your trims should be an adjustable or open reflector.
Dining room
To illuminate your dining area and accent wall art use moderate ambient light. This will create a relaxed but formal atmosphere. Use a 2-4-inch aperture with 600-1000 lumens per light and a color temperature between 2700-3000K. Here, you can also use a flood or narrow beam spread and leave 3-4 ft of space between each light. Open reflector or adjustable trims will do. Place trim fixtures with halogen MR-16 bulbs over the dining room table. Put the lights on a central dimming switch so you can set the mood and adjust the lighting to eliminate any glare from the table.
Bathroom
This room will need high ambient light so your aperture should be 2-3.5 inches. Stay within the 700-1200 range for lumens and 2700-3000K. You can choose between a narrow or spot beam spread. Give 2-3ft of space between each light. Trims with a wet rating is a must due to the fixture’s exposure to moisture.
Task lighting provides a smaller, concentrated beam of light. Place recessed downlighting in your kitchen, bathrooms, office, and any workspaces to create this layer. Get a special sealed trim or shower trim to prevent water damage from damp or wet places, like your shower, tub, or outdoor area. Prevent shadows by installing wall mount recessed fixtures in your outdoor area.
By using a 3-inch recessed lighting fixture with an aperture of 3 inches it will produce a beam that can focus on one area for task lighting. Standard open trims, premium baffles, premium deep baffles, standard baffles, and WETlites are good choices. Fixtures must be flush with the ceiling and directly over the task area for proper task lighting.
Kitchen

The fixtures should be 1ft to 2ft apart over countertops and workspaces, 12 inches to 18 inches away from cabinets. Keep in mind that placement may vary according to your kitchen layout.
Living room

Place a pair of table lamps on either side of the sofa and put a corner floor lamp for direct task lighting at the seating area.
Bedroom
If you want to create functional lighting, a pair of bedside table lamps and corner floor lamps in your bedroom will do. You’ll have task lighting for a comfortable and cozy reading atmosphere.
Impress your guests by highlighting artwork, pictures, and accolades on your wall. Position recessed lights so that it produces a concentrated focal point on what you want to accent. This layer can be created with premium open eyeball trims, premium baffle eyeball trims, premium adjustable cone, premium adjustable baffle, or premium pinhole. You can also use adjustable eyeball trims for accent lighting. They are available in 6, 5, 4, and 2-inch aperture sizes.
Let’s say you want to position your recessed lights at a 30-degree angle, but you don’t know where to place the light. You can calculate the distance by using a simple formula. The depth (D), or distance from the wall to the center of the light, equals the height (H), or the distance from the ceiling to aiming point, multiplied by .5774. Aim the light ⅓ down from the top of the object. The formula should look like this:
D= H x .5774 = the distance from object to light
Placing your recessed lights at 30 degrees will also reduce glare.
If you want to wall wash, the distance from the walls must be equal to the distance between the fixtures for an even spread of light.
Bedroom
To create accent lighting you will need low ambient light. Use a 1 to 2-inch aperture size and a light source of 200-400 Lumens per light. The temperature, 2700-3000K, should match existing task lighting. Use a spot beam spread and adjust the spacing accordingly. This lighting requires open reflector or adjustable trims. Position recessed downlights over artwork for a dramatic effect. You also have the option of getting a light headboard with a white baffle trim and 50W PAR-20 bulbs.
Living room
Create depth, glamour, and highlight artwork with 3 wall washer recessed lights highlights in your living room. For larger art pieces, use a 60W A bulbs.
Foyer
Place recessed accent lighting on the ceiling to produce shadows for a dramatic and three-dimensional effect when highlighting architectural details. The higher the foyer ceiling, the less noticeable your fixtures will be.
The trick to making a room feel larger is to illuminate vertical surfaces using a special wash trim to spread the light evenly. Premium eyelid wall wash and premium eyelid wall wash with baffle are the best trims. Downlight on the wall to bounce light from it and into the space. This illuminates the room without the harsh lights of direct downlighting.
Give yourself the ability to easily adjust the mood lighting with dimmers which are compatible with most recessed lights. They are perfect for reducing glare caused by a pendant or chandelier. Aside from allowing you to control the atmosphere, dimmers reduce energy consumption and make the bulbs last longer. It’s best to use separate dimmers for the different zones you illuminate, such as the kitchen countertops, cabinets, and pantries. That way you have various lighting options using multiple switches rather than be confined to a few options with one switch. But don’t restrict yourself by putting dimmers only on recessed lights. Put them on non-recessed lighting fixtures for more control over the lighting.
Line voltage systems with incandescent bulbs work with a standard wall dimmer. Low voltage requires a low voltage electronic or magnetic dimmer. You’ll know what dimmer you need by checking the transformer in the housing. Triac and ELV dimmers can be used with many LED housings. While most recessed lighting fixtures are compatible with dimmers, it’s better to verify with the manufacturer.
Planning your recessed lighting, basic questions
What light should you use?
Know the purpose of lighting the rooms before starting the project. Think about the type of light you want. If you want a full, wide beam of light, then use a baffle trim. Or rotate the light and focus on a specific area with an eyeball trim for accent lighting.
What’s above the ceiling?
Find out the size of housing and trim you need by measuring the ceiling hole. Remember, the fixture needs an IC rating if the housing will be surrounded by insulation. Installing the fixture should be fairly simple if you have attic access. When there’s no attic access, check if you have a shallow ceiling. If you do, then you’ll need shallow ceiling housing.
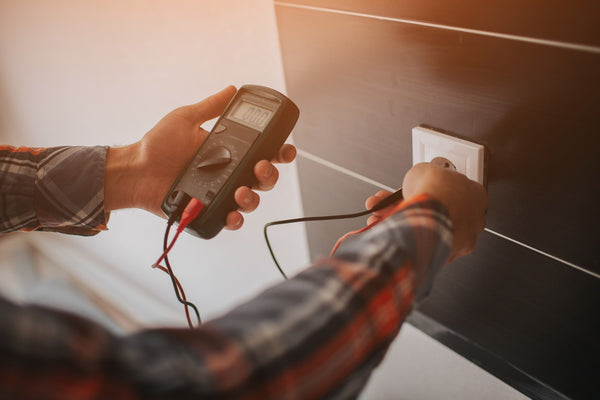
What wiring do you have?
Figure out whether the existing wiring is aluminum or copper. Make sure the new wiring is identical to the existing wiring. Have a professional check whether your wiring should be replaced if they are fabric-insulated wires or no ground wire.
How many lights should you add?
You can put in as many lights that the circuit can handle. Don’t exceed the number of watts as the existing fixtures or it will cause the circuit to overload. Have an electrician check what the circuit can carry if you plan on using more watts than your existing fixture uses.
First measure the dimension of the room and note any features and furniture placement. You’ll see the areas you need to light and what lighting layers work best. Use baffle, open, or reflector trims if you want to have general lighting. The type of ceiling you have, or any building codes will dictate the housing that you should buy. If there is a ceiling, then use retrofit housing. If there is no ceiling, then new construction housing must be installed.
Step 1: Determine your lighting application
There are steps you must take to select the appropriate brand for lighting your space. You will first need to determine how you’ll be applying the lights to the room. General lighting, accent, task lighting and wall wash all serve a different purpose. Bright general lighting is typical for living rooms and family rooms. Decide whether you want to highlight features or perform specific tasks in areas such as the bathroom or home office. You also have the choice of making the area seem bigger by wall washing.
Step 2: Determine the trim type and size to achieve the desired lighting effect
You can’t pick a trim type if you don’t know what layer you want to create. How you use the light and the type of design you want will determine the trim you need. To reduce glare, use a baffle trim. An open trim will produce a clean, finished look. Reflector trims emit lots of light. An eyeball trim allows you to adjust the light so you can aim it freely. Usually used for closets, porches, and shower lights, the lens trim diffuses light and shields the lamp. Look at all the trims to see what would be most appropriate for your purpose.
Step 3: Determine housing type
There are various factors that need to be examined before picking your housing. Consider whether you’ll need new construction housing or remodel housing. Will you need an IC rated fixture or non-IC rated? Think about airflow if you have a bottom floor and if you’ll need airtight housing. Be aware of any building energy codes.
Step 4: Determine housing size
If you’re looking to accent, create task lighting, or wall wash, housing with a 2-inch aperture will do. To wall wash, the most commonly used housing size is the 6-inch P187-TG which is great for all lighting applications. Another way to wall wash is to get a 185-TG with a 5-inch aperture. It has fewer light options but can provide all lighting layers. For accent, task, and wall washing, the P832-TG will also come in handy with its 4-inch aperture.
Step 5: Choose the right color temperature
Color temperature is extremely important in selecting your lights. The Correlated Color Temperature (CCT) refers to the color of light that the bulb produces. When you have temperatures that are over 5000K, the light source produces a cool color, bluish white in appearance. Warm colors are in the range of 2700-3000K. They look yellowish white to red. Warm white is 2600-3200K, like the color of an incandescent bulb. You’ll likely find this color temperature in the living room. Use bright white, 3200-4500K, for kitchens, bathrooms, or work spaces. Try a color temperature within the 4500-6500K range, or daylight. The color rendering index, or CRI, measures the accuracy of the light source in displaying colors. When the CRI is high, the artificial light source is better at rendering colors accurately.
First draw a plan. Take your existing lights into consideration because your new lights should be the same style and fit with the decor of the space. When you are ready to install your recessed lighting fixtures, follow the steps closely. You’ll need a hole saw, tape measure, drill, and ¼ inch drill bit. As for materials, you should have your recessed light housings, trim, wire connectors, and light bulbs. Turn the electricity off at the main fuse box. Test the wires and turn the wall switch off. Make sure your electrical connections follow local codes and keep track of the amount of wattages used.
1. Now that you have turned off the power, locate the area you’ll be installing the lights. Draw the opening for each fixture onto the ceiling using the manufacturer’s template.
2. Then drill ¼ inch hole in the ceiling at the center of the fixture’s opening. Make sure there aren’t any obstructions in the attic. Use fish tape or a coat hanger to check for obstructions if you don’t have attic access.
3. Make holes with a hole saw for the housing.
4. You’ll need to disconnect and remove the existing fixture.
5. Next, pull the cable from the power source to a recessed light, and let 18 inches hang from the ceiling for slack used to wire new fixtures. Do this for all fixtures. You’ll need to run the wire from the attic. If you have no attic access, drill through the joists and fish wire through the framing with a long drill bit.
6. Now wire the first light to the power source and cable going to the next housing. Check for 3 black wires, 3 white wires, and 3 ground wires. Put wire connectors on the connections for all the fixtures.
7. Use the manufacturer’s instructions to mount the housing and trim.
8. Now screw in the bulb.
9. Turn the power back on and make sure the lights are in working order
Recessed lighting is a practical and creative way to illuminate spaces that lack adequate lighting. You can provide ambient lighting for an entire room, highlight architectural details and features, and wash the wall with light for a dramatic effect.
Tip: If you have a small space then use smaller designs with the same lumens. Smaller spaces can now fit recessed fixtures because of these designs.
Familiarize yourself on the parts of recessed lights and their use. Think about how you want to utilize them and then create a floorplan. When buying your lights make sure you know the proper size fixture that you will need, looking at the characteristics of different housings and trims. Determine how much light output is necessary for providing enough illumination for the room. Don’t forget to put dimmers for more control over the atmosphere! Carefully follow the installation process. If you find that you are having difficulty or need help, then consult a professional. Once you set up your recessed lighting, you’ll have a clean and minimalist look that will add visual appeal and function to your space.
Recessed lighting is useful but usually poorly applied. Goal is to add visibility, appeal, and ambiance. Combine recessed lights with other types, such as decorative pendants, table lamps, sconces, candles, to make room feel balanced and inviting. Wash wall, not floor, with light: wall washer is fixture placed 18-24 inches from wall, depending on ceiling height and used in series to spread light on large surface. Bouncing light off vertical surface illuminates room. Narrow beams draw attention to specific spot in room, such as where artwork and other features are located. The right trim style is necessary. High-end fixtures are offered in metal finishes and pair with wood ceilings. Can also install fixtures that seamlessly match ceiling for minimal application. Go for warm bulb colors, such 2700 kelvins, which produces an orange/yellow glow. Halogen or incandescent. Test quality of LED to get close to halogen lighting. Not consistent with color quality between different LEDs. Use dimmers because they can extend bulb life by 10%. LEDs need electronic low-voltage dimmers, rather than magnetic low-voltage. Check the type of transformer in fixture first
https://www.hgtv.com/remodel/interior-remodel/bedroom-recessed-lighting
Recessed lighting provides general/ambient light resembling natural sunlight. Balance recess with floor lamps, pendant fixtures, flush mounted ceiling lights for layering. Avoid installing overhead in bedroom because it’s unflattering. Don’t install in nurseries, bc high-wattage lights can be uncomfortable for baby’s eyes. Halogen bulbs provide high-quality, low-voltage white light. Expensive but economical long-term. Casts white light. Incandescents are found in homes and have yellow cast.
Leave a comment